
Build a training container
The contract and procedure for running the training Docker image you already build in the platform's training wizard
Required permission: DevelopDEVELOPER · OPERATOR · ADMIN
Build the training Docker image the way you always do. You do not need to add any platform-supplied script to the image, and you do not need to follow any special format on standard output. The platform places the data in a directory beforehand, settings come in as environment variables, you upload what you want to keep to MLflow, and you report success or failure with the exit code.
This section covers that outer contract and how to verify it. It does not cover the model algorithm itself.
Summary on one page
| Item | Details |
|---|---|
| Deliverable | An image tar made with docker save (+ tag name · sha256) |
| Execution | The platform runs the image's ENTRYPOINT as is. It does not override the command |
| Input | The platform downloads the training data beforehand and places it in /geo/dataset. You need no download code and no storage credentials |
| Settings | Hyperparameters, task and GPU all come in as environment variables |
| Output | Upload everything you want to keep to MLflow. The container file system disappears when the run ends |
| Exit | exit 0 = success, anything else = failure. That is all |
The flow of one training run
One training run executes as one Kubernetes Job (one pod). The platform does ①–③ and ⑧–⑩; the container is involved only in ④–⑦.
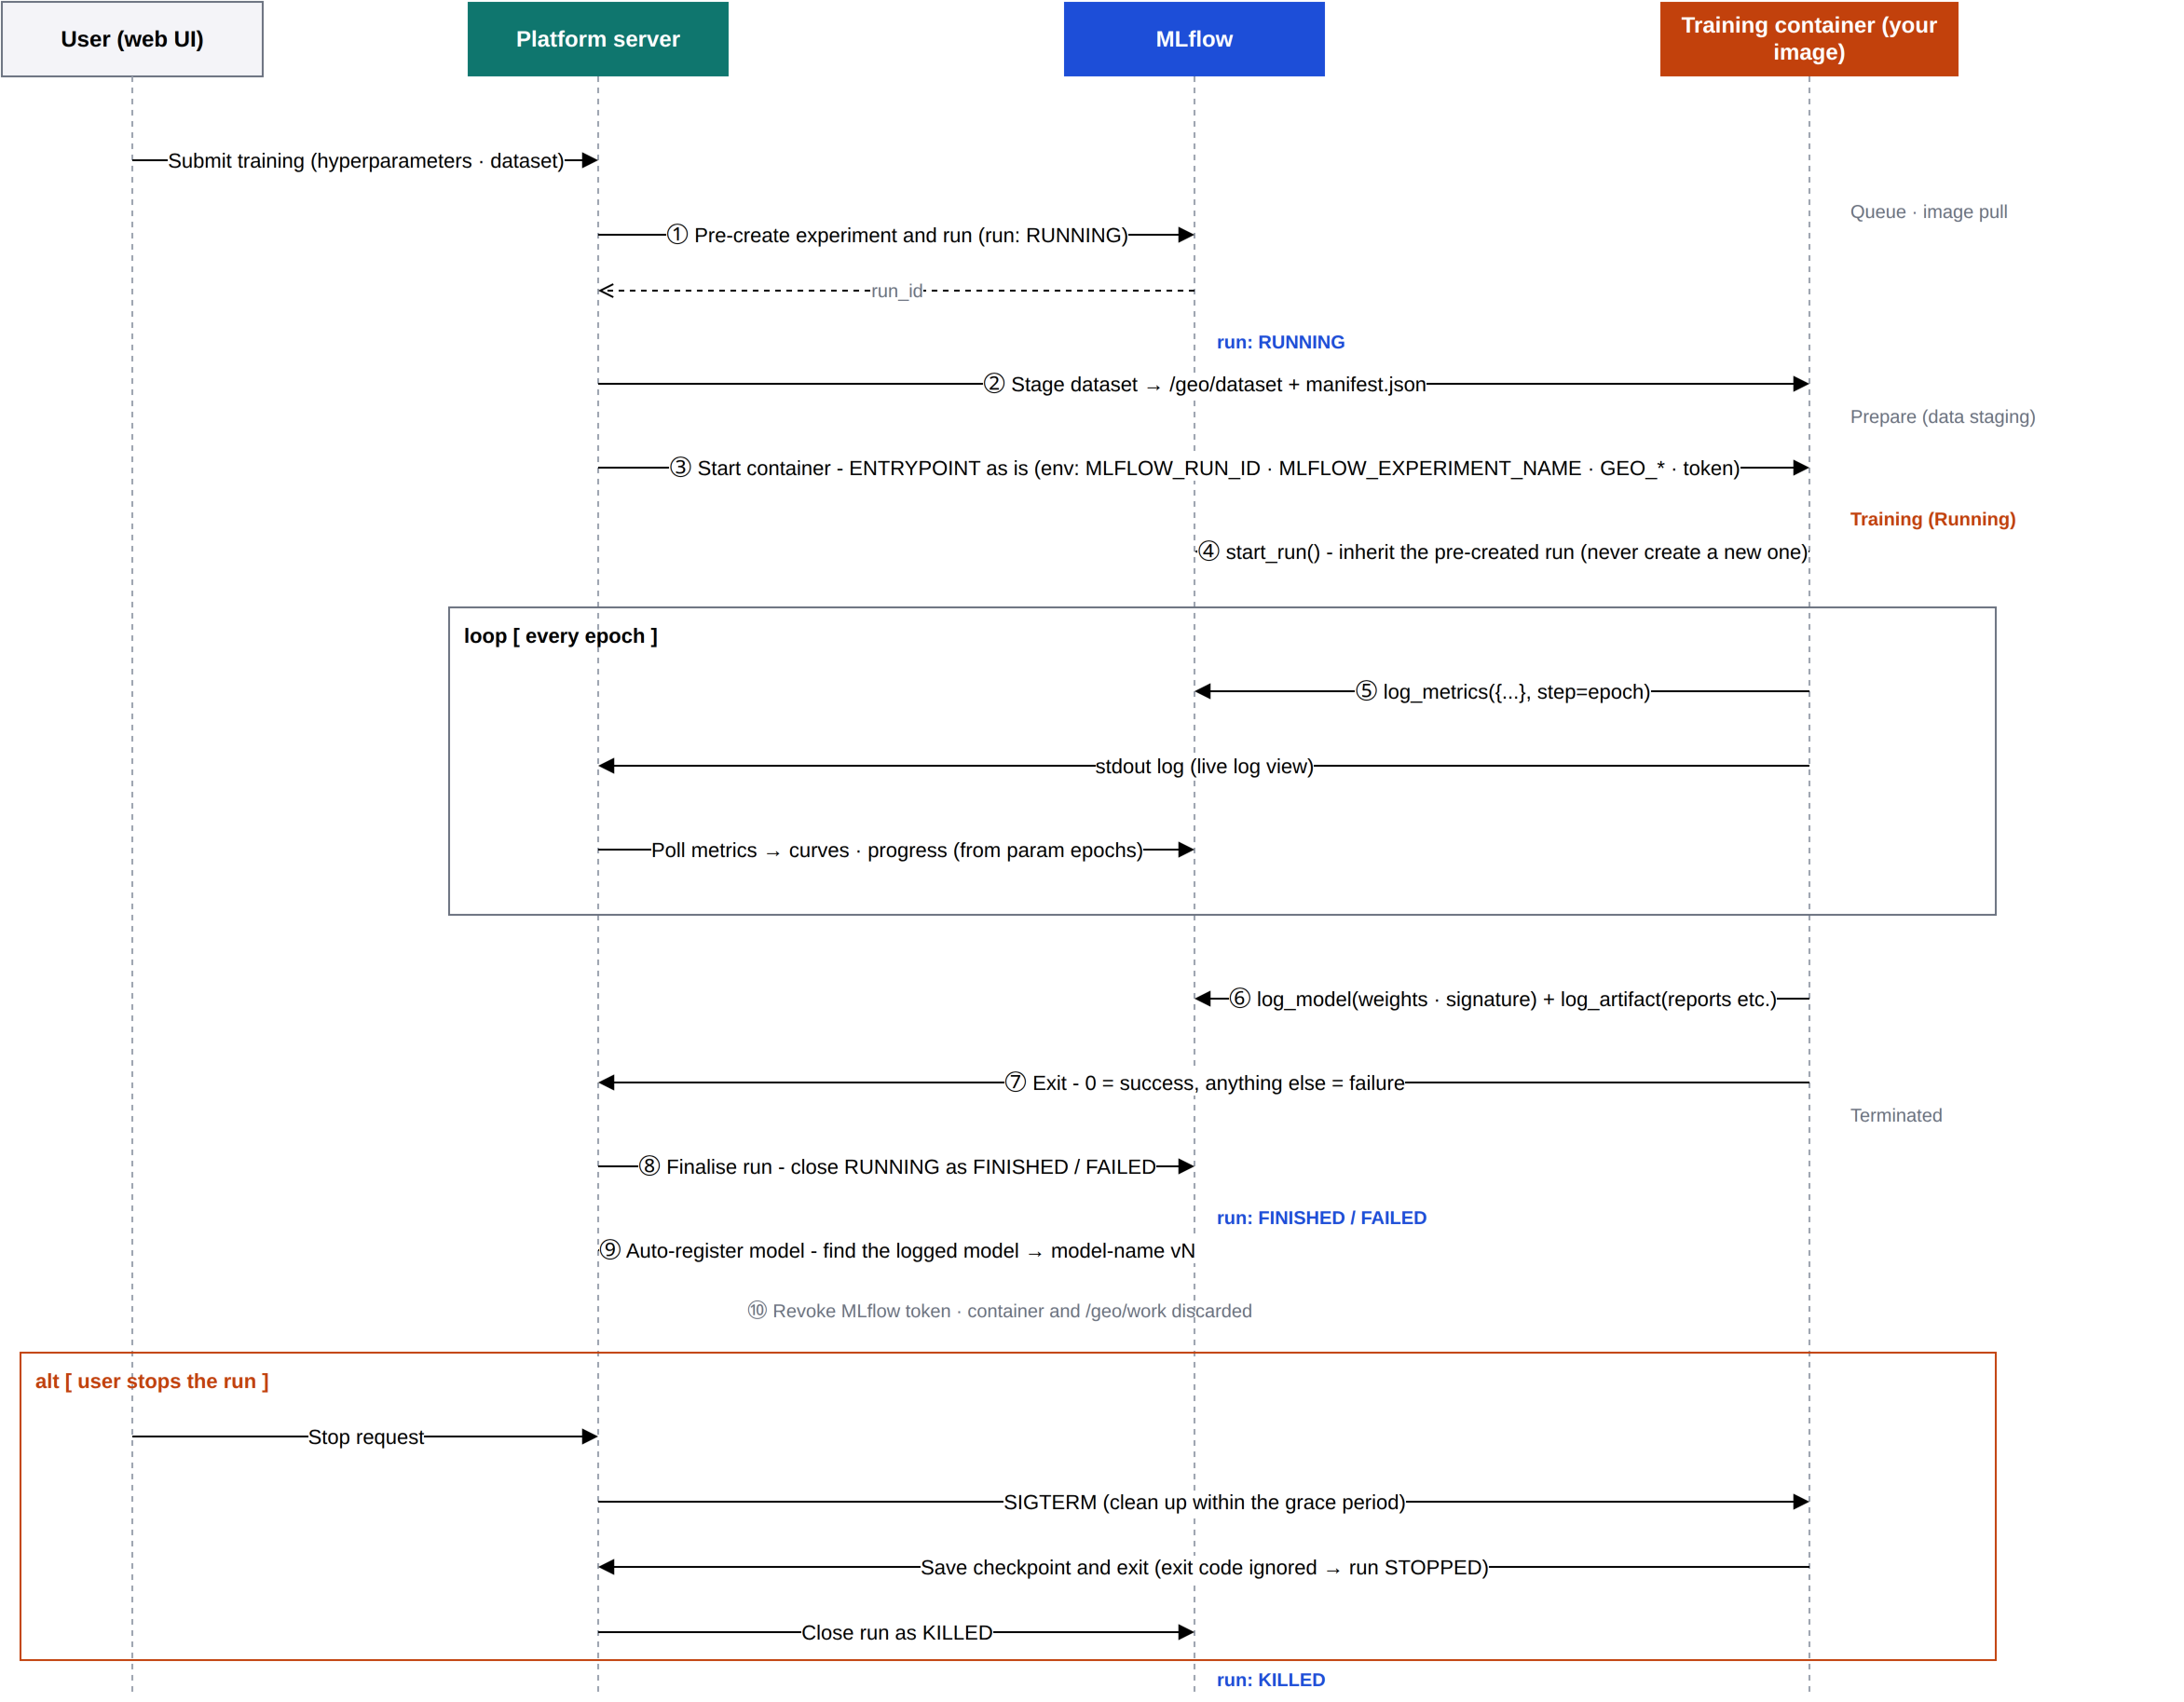
- The MLflow run already exists at submission time (①). The container's
mlflow.start_run()only takes over that run (④). Even if the container dies without closing the run, the platform settles the final state from the exit code (⑧). - Logs and metrics take different paths. Standard output flows only to the live log on screen; the platform reads curves and progress from MLflow (⑤). Numbers you
printdo not become curves. - Data preparation finishes before your training code starts (②). The pod's init container fetches the dataset and places it in
/geo/dataset, and only then does your image start.
The six steps the server shows
The Progress steps (진행 단계) on the training detail screen are fixed at six, and they move only on facts the platform observes. The trainer has no way to report a step, and no need to.
| # | Step key | Screen name | What moves it forward |
|---|---|---|---|
| 1 | queue | Queued (실행 대기) | From submission until a run slot is free |
| 2 | runtime_prepare | Prepare training environment (학습 환경 준비) | Resolving the training runtime variant, preparing image pull credentials |
| 3 | data_stage | Prepare dataset (데이터셋 준비) | Dataset staging by the init container (progress by file count) |
| 4 | train | Training (학습) | Your ENTRYPOINT. Progress = MLflow's max(step)+1 / params.epochs |
| 5 | register | Register in model registry (모델 레지스트리 등록) | Registering the logged model as a new version in the registry |
| 6 | finalize | Finalize results (결과 정리) | Closing out the state, revoking the run token |
Order of this section
- Three things a trainer does — metrics, model logging, exit code
- Paths and environment variables inside the container
- The full MNIST example — a complete set you copy and swap in your training code
- Verify locally first
- Upload the image to the platform — tar import or
docker push - Make it selectable in the wizard — external-image variant
- Catalog registration requests — new tasks, models, hyperparameters
- Built-in training runtimes — YOLO · RF-DETR · Pointcept
- Pretrained weights
- Common failures